
Overview
Visionary Fellowship is a part-time program for student software engineers, project managers, and designers. This program matches you with a company to work on a project for 12 weeks. They provide mentors, workshops, and support. At the end of the 12 weeks, we built this Receipt Builder application for a vendor dashboard.
Problem Statement:
It is currently difficult, time-consuming, and wasteful for vendors to customize their receipts. As a result, restaurants often use a single receipt format for customers, staff, and accounting purposes, resulting in each user needing to process extraneous information.
The Goal:
To provide a means for vendors to customize their receipts through a virtual receipt builder web application. By giving vendors access to an application with a user-friendly interface, non-technical restaurant managers can easily tailor their receipts without needing to go through the trial-and-error associated with editing traditional receipts.
Tools
Figma, Zeplin, Jira, Confluence, Slack
The Team:
My role, Lead Designer
1 Project Manager
2 front-end developers
1 back-end developer
Target users:
Vendor management who want to manage the content and configuration of their receipts. They may have multiple types of receipts and value the flexibility of being able to alter their receipts themselves.
Vendors may want to customize receipts for:
Customers by highlighting promotions, coupons, and loyalty points
Kitchens by highlighting order information along with customization and prioritizing readability
Management’s accounting records by highlighting transaction information
Grouping components
Organizing components based on the Product Requirement Document. Per Canadian Revenue Agency, the blue cards are required for receipts, and yellow cards are optional. Since vendors will create their receipts I’ve decided to show a checklist in the UI to make it easy for the user to gather all CRA requirements.
research
I found inspiration from Voiceflow, Hubspot, Webflow, and Jotform. Based on my research I decided a left sidebar would be the most accessible for users for dragging and dropping into the middle canvas, and a right sidebar for modifications.
Drag and Drop Feature
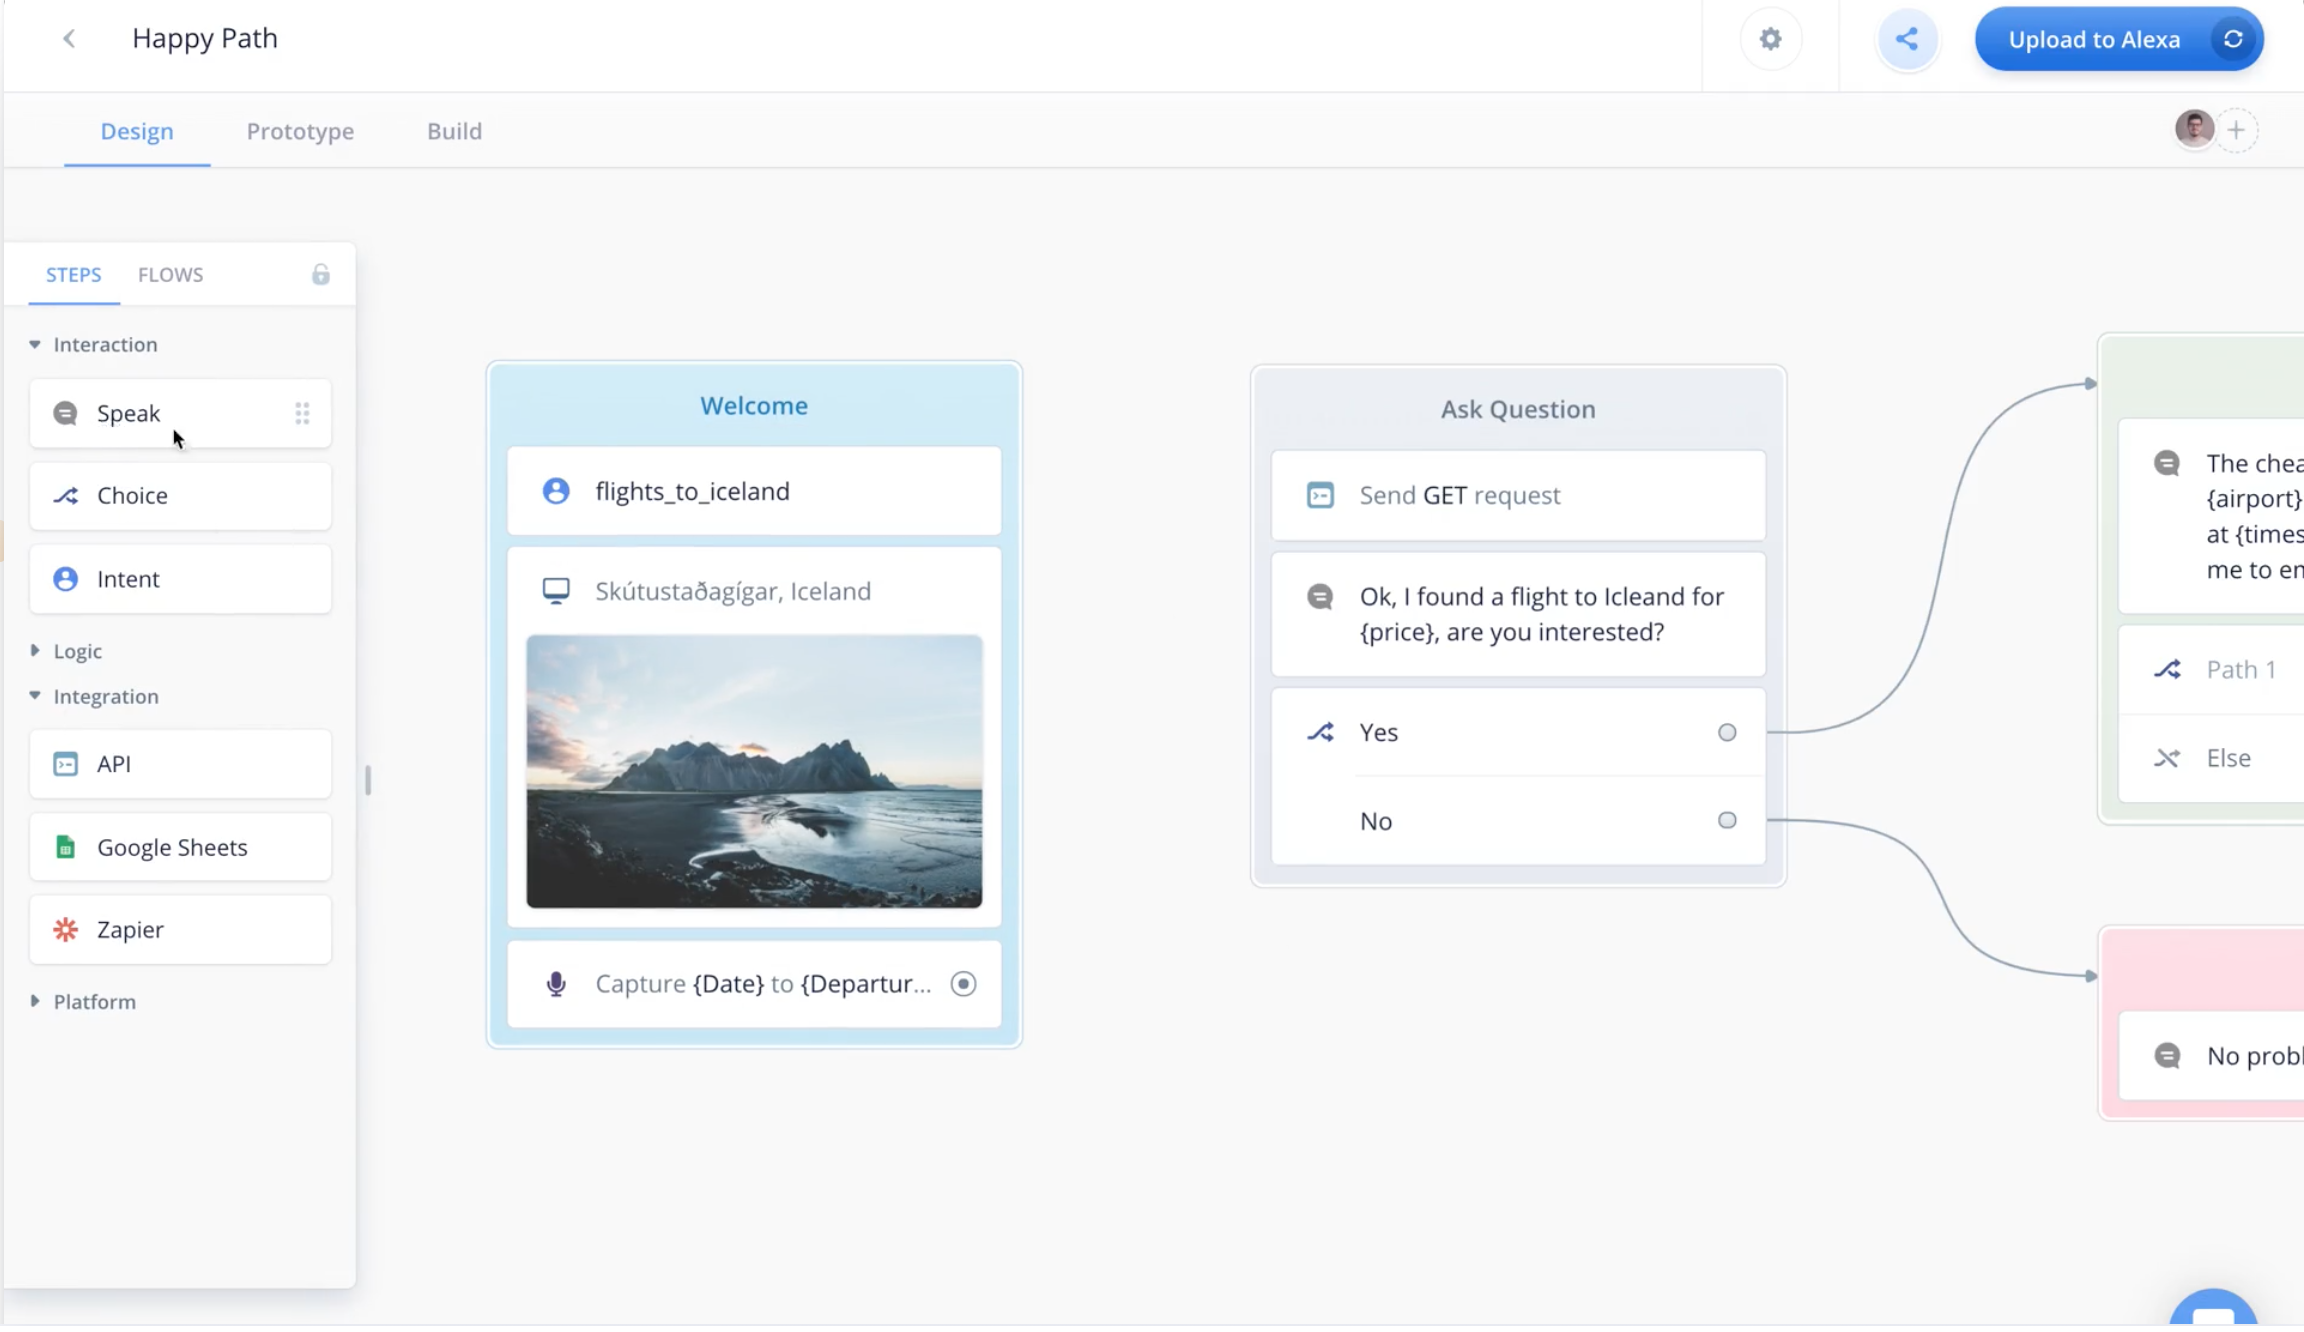
Voiceflow
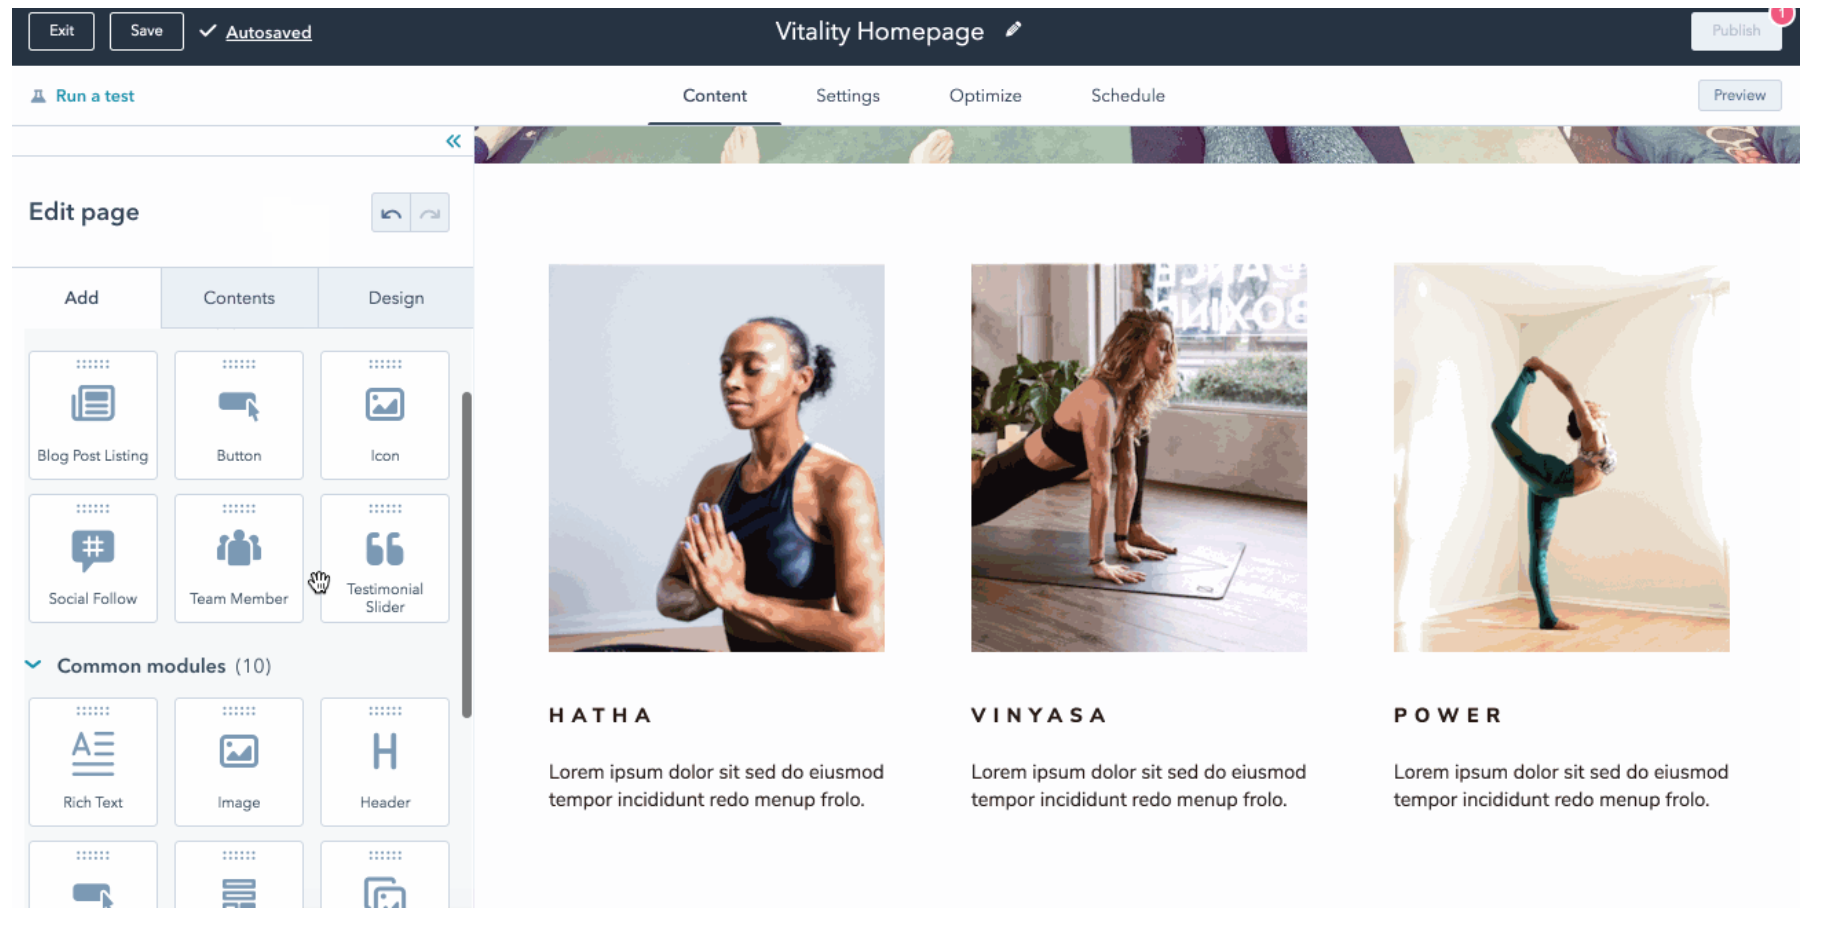
Hubspot
Builder applications

Webflow

Jotform
Hi-fi prototype
Creating a new receipt
Dropdown menu with the option to view other created receipts
Naming a new receipt, selecting a printer, and categorizing the type of receipt (ie, customer, kitchen, or management)
Selecting a template or choosing a blank canvas
interactions
Menu Layout Options
Standard View and Alternative View options- Preview switch icon allows users to see layout in real time
A tooltip example shows when hovering over menu item in middle canvas
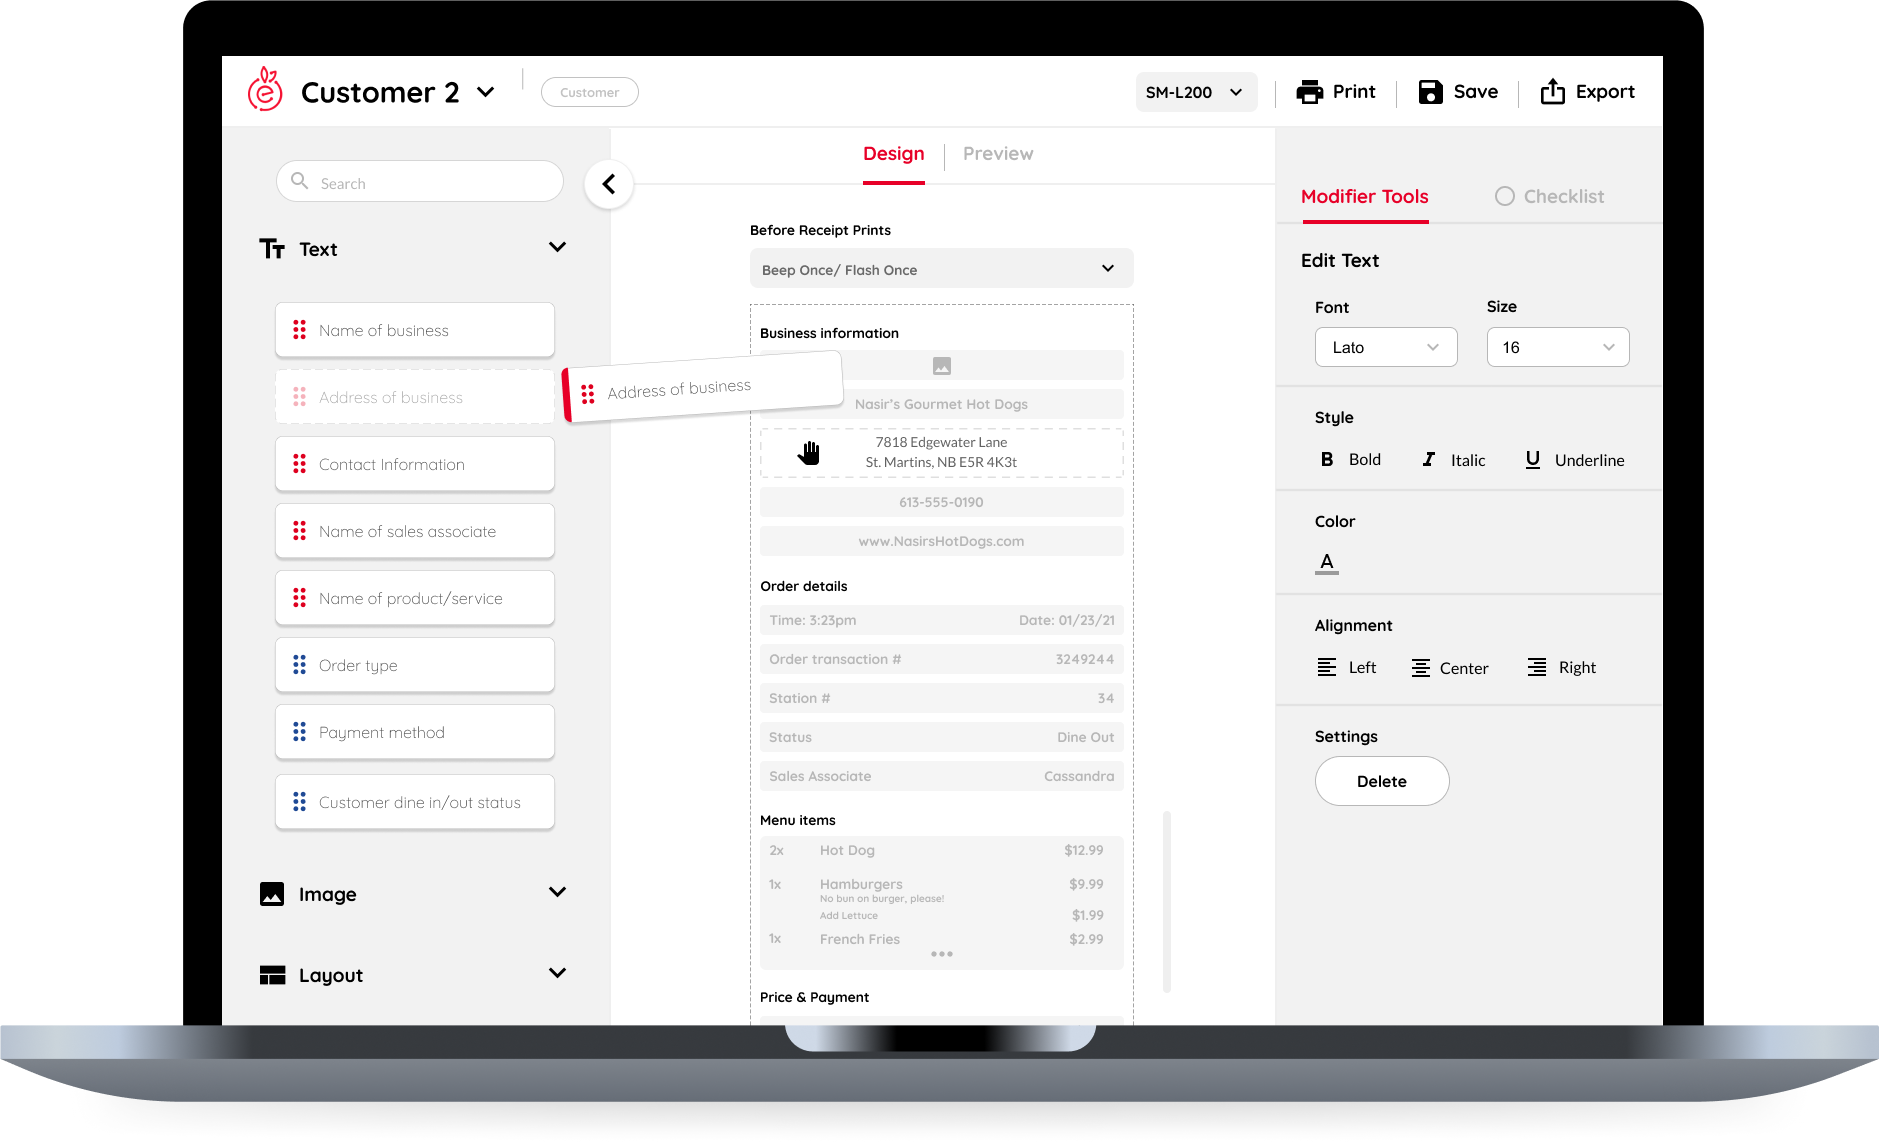
Left Sidebar: Drag and Drop Feature
Drag and drop feature allows vendor managers to:
Search for categories
Find draggable components to create receipt
See which components are required (red) and recommended (blue) by viewing the icons.
Middle Canvas: Printer Settings, and Layout
Customization in middle canvas allows vendor managers to:
Select printer options, sound and light depending on what type of printer they have
Move components and arrange according to their preference
View the receipt in a Preview mode before sending to printer
Project Retrospective
Developer Consultations
When creating these UI elements I often collaborated with the development team to gather their insights. I learned about how much time it takes to create some designs and this helped me think about the scope of the project more clearly to determine if my design would work given our timeframe.
Figma into Zeplin
In this project, I learned more about components, and layouts in Figma and how using these features not only saves time but helps to deliver materials quickly to the rest of the team.